Exporting Issues
Last updated: October 2, 2026
OverlayQA exports issues directly to Jira, Linear, Notion, Asana, Trello, ClickUp, or GitHub Issues with full technical context. Each exported issue includes screenshots, CSS selectors, computed styles, page URL, viewport size, and browser metadata so developers can reproduce and fix problems without back-and-forth.
Select Issues to Export
In the OverlayQA sidebar, navigate to your project's issue list. Select one or more issues using the checkboxes, then click Export and choose your destination: Jira, Linear, Notion, Asana, Trello, ClickUp, or GitHub.
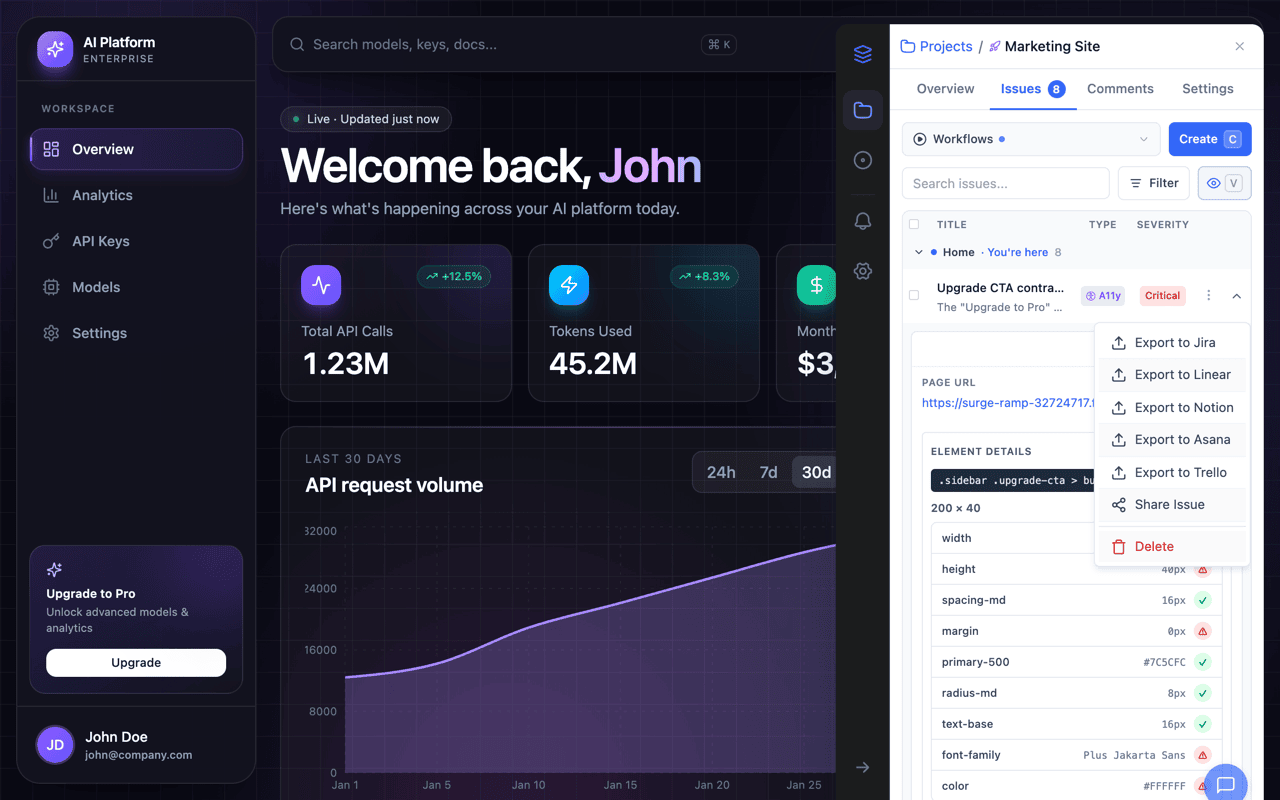
Connect Your Account (First Time)
The first time you export to a provider, you'll be prompted to connect your account via OAuth. Click Connect [Provider] to open the authorization page in a new tab. After you approve access, the export modal updates automatically. You only need to do this once per provider.
Exporting to Jira
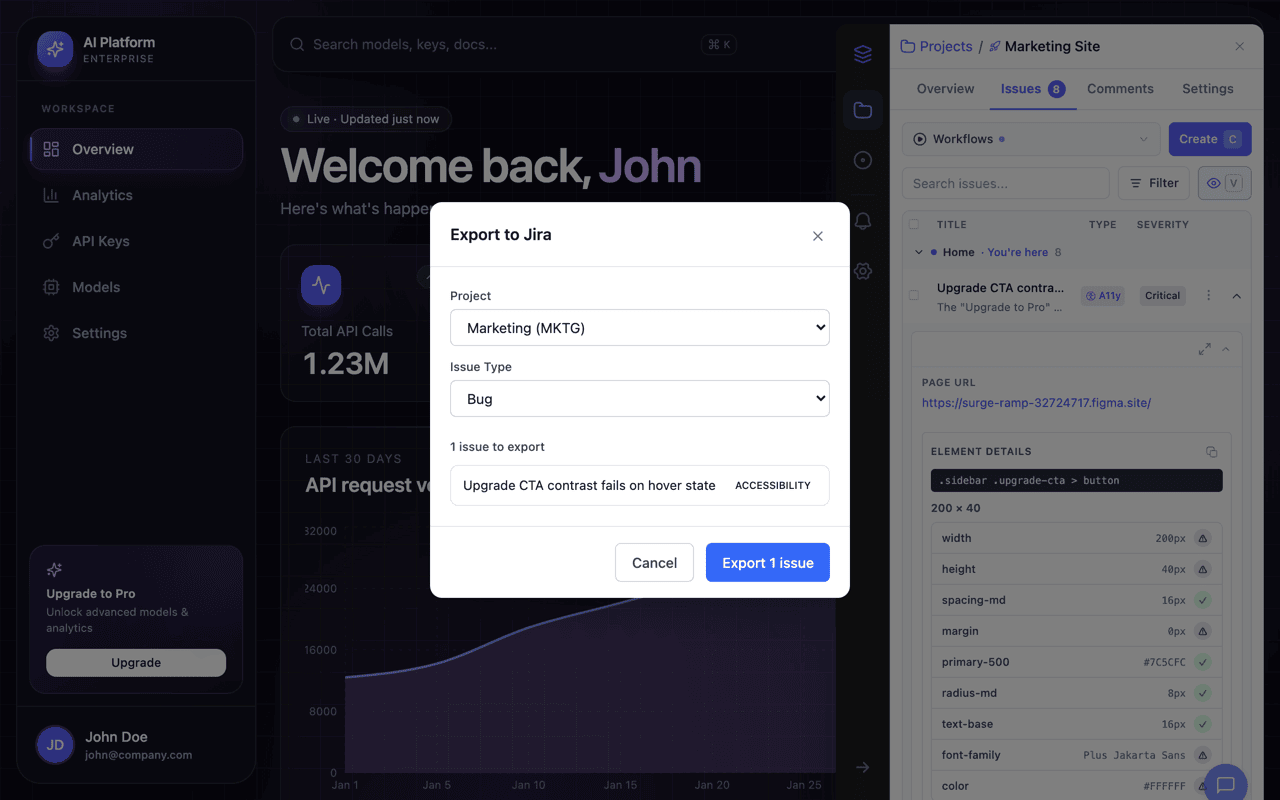
After connecting Jira, configure where issues should land:
- Site: If you have multiple Jira Cloud instances, select which one to use.
- Project: Choose the Jira project (e.g., "Marketing (MKTG)").
- Issue type: Select the issue type (Bug, Task, Story, etc.). OverlayQA defaults to "Bug" if available.
Click Export to send the issues. Each issue is created in Jira with the screenshot attached, a description containing all technical context, and the overlayqa label applied automatically.
Exporting to Linear
After connecting Linear, select the Team where issues should be created. Click Export to send the issues. Each issue includes the screenshot, full technical details in the description, and a link back to the page where the issue was found.
Exporting to Notion
Notion is the simplest export. After connecting your Notion workspace, click Export with no additional configuration needed. On first export, OverlayQA automatically creates an "OverlayQA Issues" database in your workspace. Subsequent exports add to the same database.
Each Notion database entry includes properties for severity, type, page URL, Figma URL, browser, OS, viewport, and status (set to "Open").
What Gets Exported
Every exported issue includes the following technical context:
| Field | Description |
|---|---|
| Title and description | The issue title and description you wrote (or AI drafted). |
| Screenshot | Attached as an image file showing the captured area or element. |
| CSS selector | The element's unique selector path for developer reference. |
| Computed CSS values | Font size, color, padding, margin, background color, border radius, and other computed styles. |
| Page URL | The exact URL where the issue was found. |
| Viewport dimensions | Browser window width and height at the time of capture. |
| Browser and OS | Chrome version and operating system (e.g., "Chrome 120 on macOS 14"). |
| Figma frame link | A link to the associated Figma frame, if one is linked to the project. |
| Type and severity | The issue type (Design Bug, Design Gap, etc.) and severity level. |
| Labels | The issue's workspace labels are written into the ticket description as a Labels: line (they are not mapped onto tracker-native labels). See Labels, Assignees, and Filters. |
What Is Not Exported
Note: Exports include computed values from the live page only. They do not include expected design spec values or side-by-side comparisons. A per-project field picker at export lets you set assignee, labels, status, tags, and priority where the destination supports them; unsupported fields are hidden.
Copy Findings Without a Tracker
You don't need a connected tracker to hand findings to a developer or an AI coding tool. After an Accessibility Audit, a Design System Audit, a Visual Comparison, or an Auto Review, select findings and open the bulk actions menu. Three copy options put them on your clipboard:
- Copy findings: plain text, ready to paste into a message or ticket.
- Copy as Markdown: paste into a pull request, a doc, or an AI coding tool like Claude Code or Cursor.
- Copy as CSV: paste into a spreadsheet, one finding per row.
Every copy carries the issue type, each element selector, the suggested fix where there is one, and a screenshot link for each finding. Copying works in the extension and in Team Review.
After Exporting
After a successful export, the results screen shows each issue with a clickable link to the created Jira ticket, Linear issue, or Notion page. Issues that were previously exported to the same provider are flagged with a warning before re-export to prevent duplicates.
Exported issues are marked in the OverlayQA sidebar so you can see at a glance which issues have been sent to your project management tool.
Slack Notifications
If your team has connected Slack, OverlayQA also posts a notification to your configured channel whenever an issue is created or assigned. This keeps team members informed without checking the dashboard. See Connect Slack for setup instructions.